ATTENTION: myOUC will be undergoing maintenance from 8 p.m. to 8:20 p.m. this evening and from 9:30 p.m. until 2 a.m., November 15. If you cannot access your account during this time, please try again later. Thank you for your understanding.

Energy Conservation Tips

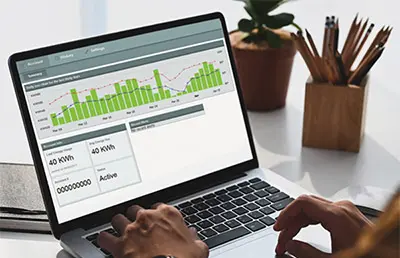
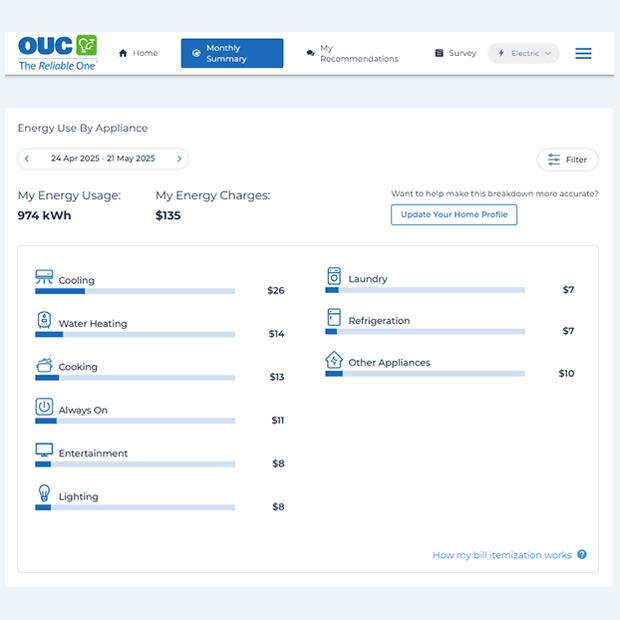
Anytime is a great time for you and your family to discuss your energy usage and find ways to conserve the environment and save money. In addition, OUC offers an online Usage Dashboard to track your daily energy consumption.

2 LED Light Bulbs

Safety first! Turn off power to existing light bulbs and allow them to cool if incandescent. (Luckily your new LED light bulbs will last longer and will not produce much heat.) Gently remove the existing light bulbs by turning them counterclockwise. Now you can replace them with your LED light bulbs by slowly twisting them clockwise until secure.

2 LED Night Lights

Night lights are ideal for high-traffic areas such as hallways and can help you feel safer when placed in kitchens, bathrooms, and bedrooms. Using high-efficiency LED night lights allows you to see your surroundings without having to turn on bright lamps or overhead lighting. Simply plug in your LED night lights where you prefer without having to worry about unplugging them. These night lights have a sensor to automatically turn on in darkness and off in light while always remaining cool to the touch.


1 Roll of Weather-Stripping

Supplies needed: tape measure, scissors, rags, soap and water.

Proper insulation keeps your house cool in warm weather and warm in cool weather. Your roll of weather-stripping can help seal windows and door frames to reduce temperature fluctuation in your home. Start by removing old stripping and using soap and water on a rag to wipe away any remaining residue. Dry the frame with another rag. Then measure the top and sides of your frame with a tape measure. Using the measurements you record, carefully cut the pieces of your weather-stripping to the corresponding lengths. For windows, you will need a total of four strips, one for the top, one for the bottom, and one for each side. For doors, you will need a total of three strips, one for the top and one for each side. Depending on the condition of your windows and doors, you may not need to add weather-stripping to every side. After evaluating the conditions of the frames and cutting the stripping as needed, it’s time to apply your new strips. Line the first piece along the side of the frame, starting with the top corner. Once held in place, remove the backing of the weather-stripping with the sticky side against the frame and press it firmly against the frame. Repeat the placement process for the remaining sides.

home_conservation

There are a number of simple things you can do around the house to save money on energy costs all year-round.

Ways to Slay Energy Vampires

Make sure your new electronic gadgets don't suck your wallet dry.

Many TVs, DVD players, cell phone chargers, power adapters, computers and other electronics use vampire power, or standby power, even when they’re turned off. Although individually these devices typically draw only a very small amount of power, together it adds up, especially when left plugged in 24 hours a day, seven days a week.

To combat these energy vampires and reduce your consumption, unplug the appliances when not in use. Using a surge protector with multiple sockets will allow you to turn off multiple devices with one switch. A timer can automate turning on and off those electronics that are used on a regular schedule.

Replacing battery powered devices, such as cordless phones or rechargeable razors, with corded alternatives also cuts down on the standby power required to charge the battery and reduces energy lost in battery charging.

The Winning Number Is... 78

Air conditioning and heating can account for more than 50 percent of the electric bill! To keep cool during summer's heat, set your air conditioning thermostat at 78 degrees. When you leave your house, turn it up a few notches to 85 degrees or higher and plan on a savings of 6-8 percent for each degree you raise the setting. In the winter, set your thermostat at 68 degrees.

Breezy Does It

Installing ceiling fans throughout your home will help you stay comfortably cool. In fact, you could raise your thermostat several degrees and not feel the difference. Turn fans off in unoccupied areas.

Made In The Shade

Close those curtains! Or mini-blinds, or shutters—and you'll keep the summer's heat out. During winter months, open your shades again and let in the warm sunshine. For extra shade, plant plenty of trees and shrubs.

Open And Shut Case

Looking for a snack? Try to figure out what you want before you head for the fridge. Frequently opening and closing the refrigerator door can increase your electric bill. For extra energy savings, clean the condenser coils behind or underneath the refrigerator every six months.

Change Is Good

Change or clean heating and air-conditioning filters monthly. Dirty filters put an unnecessary strain on the unit and can increase operating costs.

Tweak Those Leaks

Check air handler and ductwork for leaks and weather-strip or caulk around windows, doors, plumbing and other gaps so that heating and cooling energy won't escape. Check for water leaks, too. Toilets, in particular, should be checked often.

All Washed Up

Run your clothes or dishwasher only when you have accumulated a full load. You'll save on the electricity that heats the water and runs the appliances. Also, be sure to clean the dryer lint filter after every load.

Ready, Aim, Sprinkle

Water your lawn before 10 a.m. This saves water from evaporation. Don't overwater and avoid watering the street and sidewalk by aiming your sprinkler away.

View here to learn about the Waterwise Enforcement Team's on-the-lookout for irrigation violations.

A Good Read

Learn to read your electric and water meters so you can monitor your usage.

Shed Some Light On The Subject

Try replacing incandescent lights with LED. LEDs give you the same light output, but for one-third to one-half the cost. They also produce less heat for your air conditioner to cool.

Cool Suds

Try using the cold or warm setting on your clothes washer instead of hot. You'll be amazed at the savings. Set your water heater to 125 degrees.

Consumer Tax Credits

A tax credit can provide significant savings. It reduces the amount of income tax you have to pay. Unlike a deduction, which reduces the amount of income subject to tax, a tax credit directly reduces the tax itself. Find out which energy efficiency Federal Tax Credits you qualify for.

apts

If your electric bill is higher than you want it to be and you'd like to bring it down... then you need to know what's making it go up. 

Here are the culprits:

Plug Into Savings
You can take a number of steps to lower your electric bill, including: 

Raise The Bar
The easiest way to save energy is to raise your thermostat a little when it's warm outside, and lower when it's cool. In the summer, keep your air conditioner thermostat set at 78 degrees or higher. Turn it off completely or set it at 85 degrees when you're away from home for more than four hours. 

Less Is More
During winter months, set your heat thermostat at 68 degrees or less, and turn it down to 55 degrees at bedtime. (Add an extra blanket or comforter.) 

Fantastic Idea
Use circulating fans to increase comfort; turn them off in unoccupied areas. 

Monthly Ritual
Clean or replace air conditioner filter monthly. 

Ready, Reset, Go
Reset both upper and lower thermostats on your hot water heater to 125 degrees or lower. 

Off You Go!
If you leave your apartment for two days or more, turn off the power to your hot water heater at the circuit breaker. 

Cool Suds
Wash and rinse your clothes in cold water.

Made In The Shade
Use shades, drapes, blinds or other window coverings to keep out summer heat and winter cold.

For more information, download the Apartment Energy Guide brochure

Energy Conservation Videos (English)


Energy Conservation Videos (español)

Water Conservation Tips

Understand the importance of watering restrictions, learn about strategic landscaping and make our simple household tips a matter of habit. For more on OUC's high quality water, click here.

2 Toilet Tank Dye Tablets

Toilet Tank Dye Tablets allow you to detect a toilet leak quickly and efficiently. To perform a toilet leak test, you’ll start by removing your toilet tank lid and placing it gently out of the way where it cannot get damaged. Check the water level inside the tank to make sure it’s at the indicated line. If you make any adjustments to the water level, be sure to flush the toilet once to reset it. Now you can drop a single dye tablet into the tank, making sure NOT to flush. Allow it to dissolve for 15 minutes. After 15 minutes, look for any color within your toilet bowl. Color in your toilet bowl indicates there is an ongoing leak from your tank to the bowl that can be resolved by replacing your toilet’s flapper valve.

2 Low-Flow Showerheads

Supplies needed: adjustable wrench, plumbing tape, rag or towel.

Low-flow showerheads are designed to use less water than standard shower heads, allowing you to conserve more water in the long run. To replace your showerheads with your low-flow showerheads, begin by protecting your shower arm by wrapping a rag around it. Using an adjustable wrench, gently loosen and unscrew the old showerhead. With the old showerhead removed and set aside, take a moment to clean any residue or buildup off the threads of the shower arm and wrap clockwise with new plumbing tape. This will ensure a tight seal and prevent any leaks. With your new low-flow showerhead in hand, gently turn it until firmly in place on the shower arm. You can then secure it further by wrapping your rag around the shower head and tightening it with your wrench, making sure not to over-tighten.

View this video to see how it's done.

1 Toilet Flapper

When water leaks from your toilet tank and into your bowl (as proven with your toilet tank dye tablets), your toilet flapper most likely needs to be replaced. The first step is to turn off the water to your toilet by locating the shutoff valve against the wall that is connected to the water line connected to your toilet. Turning the dial clockwise until it stops moving shuts off the water to prevent the tank from refilling while you install the new flapper. Now that your toilet water supply is off, you can gently remove the toilet tank lid, setting it aside. Then, flush your toilet holding the handle down to empty the remaining water in the tank. Now remove the old flapper by unhooking the chain and removing the rubber tabs from the valve pegs. Before installing your new flapper, make sure it matches the size of the old one. If it’s the correct size, you can install it. Start by setting the flapper over the valve opening at the bottom of the tank and sliding the rubber tabs over the valve pegs and clipping the chain to the lower end of the toilet handle lever. Adjust the chain length so that the flapper can open and close easily. The ideal amount of tension on the chain will allow the flapper to lift easily when flushed, while still allowing it to seal completely. Once in place, you can turn your water back on by moving the dial on the water valve connected to the toilet counterclockwise. When the water has refilled the tank, your new flapper should create a watertight seal and prevent water from running. If water still runs, your flapper may need further adjustment. Once the tank is filled and you have confirmed no water is running, you can place the toilet tank lid back on the tank. Toilet flappers should typically be replaced every 2-3 years.


View this video to see how it's done.

1 Suction Cup Shower Timer

For maximum water conservation, it is recommended to take a five-minute shower. Shower timers make it easy to reach that goal, helping you stay on track by bringing awareness to the amount of time you are using water. You can easily attach your shower timer to the wall tiles in your shower, a glass shower door, or even your bathroom mirror. Simply flip it over when you are ready to hop in the shower and try to complete it before all the sand reaches the bottom of the timer.

1 Rain Gauge

A rain gauge is used to measure precipitation, which is useful when it comes to knowing how often your grass or plants need to be watered. Typically, a healthy lawn needs no more than one inch of water per week. If your rain gauge collects one inch of water after it rains, your lawn should not require irrigation for at least another week. You can also use your rain gauge to determine if your plants need water as well. Using the water nature has already provided helps conserve water and avoid overwatering. For the most accurate reading, it is important to place your rain gauge in the ground so that it sits level and is out in the open, keeping it far enough from any obstructions (i.e. trees, buildings, fences, etc.) that could prevent rain from reaching it.

faucet_stop

It's important for all Floridians to practice water conservation, and it’s easy to do once you grasp the basics. Understand the importance of watering restrictions, learn about strategic landscaping and make our simple household tips a matter of habit.

General Outdoor Conservation Tips

  • When washing your car with a hose, always use a spray nozzle to stop water flow between rinsings
  • Clean driveways and sidewalks with a broom instead of a hose
  • Check for leaks in outdoor faucets, pipes and hoses, repairing any leaks promptly
  • Cover your pool or spa to reduce evaporation
  • Check for pool/spa leaks, making repairs promptly

Saving Water Inside Your Home

  • Repair leaking faucets and toilets
  • Install water-saver flush valves in toilets
  • Install water-saver shower heads
  • Take short showers
  • Turn off the water while brushing your teeth or shaving
  • Wash only full loads in dishwasher and clothes washer
  • Recycle water rather than pouring it down the drain (For instance, used water from a fish tank is good for watering plants)
  • Only flush toilet paper down the toilet
  • Use the garbage disposal sparingly
  • When you wash dishes by hand, fill up the sink with water and turn off the faucet

Additional Information

toilet_repair

In a typical house, leaky toilets and faucets can waste hundreds of gallons of water each day, and that means unnecessary water and sewer charges. To help you identify and repair leaks, OUC offers the following advice:

  • Make sure no water is running in the house and observe your water meter (If you see the meter's dial or triangle moving, you may have a leak somewhere).
  • Check toilets for silent leaks by putting a few drops of food coloring in the toilet tank after it has filled. If coloring shows up in the bowl without flushing, you probably have a leak in or around the flapper valve. (Leaky toilets can usually be repaired inexpensively by replacing the flapper mechanism).
  • Inspect the water level in the toilet tank. The correct water line is about a half-inch below the top of the overflow pipe. If it is higher, water is being wasted.
  • Check faucets in the bathroom, kitchen, laundry room and outside the house. (Worn washers are the biggest cause of faucet leaks.)
  • To find so-called "phantom leaks," such as those occurring in pipes behind walls, under floors or under foundations, homeowners may need to contact a leak detection company.
  • Always repair leaks promptly. If you can't make the repairs yourself, call a licensed plumbing contractor.

Leak Facts

  • A 1/8-inch hole in a metal pipe, at 40 psi (pounds per square inch), leaks 2,500 gallons of water every 24 hours.
  • A leak the size of a pinhead can waste 360,000 gallons a year, enough to fill 12,000 bathtubs to the overflow mark.
  • A leaking toilet can use 90,000 gallons of water in 30 days.
  • A dripping faucet/hose bibb can lose up to 180 gallons a month, or 2,160 gallons per year.
  • About 1 in every 20 pools has a leak.
  • About 1 in every 318 homes or buildings has a leak.
  • A typical toilet leak at today's rate can add $500 to a single water bill.
  • One trip through a car wash uses 150 gallons of drinking water.
  • Collecting water for gardening from the faucet while waiting for hot water saves about 250 gallons of water a month.
  • Using a broom to clean the sidewalk instead of a hose saves 150 gallons of water.
  • Using a pool cover prevents about 1,000 gallons per month from evaporating.
sprinkler

ATTENTION: To reduce demand for liquid oxygen, OUC asks water customers without reclaimed water systems to immediately stop irrigating their lawns, and all customers to stop washing vehicles and performing non-critical activities like pressure washing. Learn more

Watering Your Lawn Wisely

Did you know that irrigation accounts for more than half of Central Florida's total water consumption? How can you make a difference? Practicing water conservation in your yard is the best place to start. Remember: Over-watering is not only wasteful, it also promotes shallow root growth and makes your lawn more susceptible to insects and disease.

If you have an automatic sprinkler system, it's important to check the system regularly (once every month or two) for leaks and broken sprinkler heads, making repairs promptly. Also check for signs of broken or leaky sprinkler system pipes by looking for muddy or overgrown areas of turf. Make sure your sprinkler system's timer/controller is operating correctly, as you've programmed it, so that it operates on the right days, at the right times, for the right durations. A variety of factors can result in a malfunctioning sprinkler system, including lightning strikes and failing timer batteries. Many homeowners don't realize their sprinkler systems are malfunctioning because the systems are programmed to operate overnight and they never observe them running.

To avoid wasting water, please follow these important irrigation guidelines:

  • Water only before 10 a.m. or after 4 p.m. to minimize the amount of water lost to evaporation
  • Water just once a week in the cooler months, and twice a week in the warmer months (experts say this is enough to maintain healthy, green grass with a strong root system)
  • Daylight Saving Time: Second Sunday in March until the first Sunday in November
  • Eastern Standard Time: First Sunday in November until the second Sunday in March
  • Water only when needed and not between 10 a.m. and 4 p.m.
  • Water for no more than one hour per zone.
  • Restrictions apply to private wells and pumps, ground or surface water and water from public and private utilities.
  • If you have planted a section of new grass or plants, that area may be watered every day for the first 30 days and every other day for the next 30 days as needed, after which you should return to the regular watering schedule. Remember, only the new plants and grass may be watered every day.
  • If you need to run a test of your irrigation system, you may run the system at anytime for 20 minutes per zone.
  • Water for just 30-45 minutes per session (½ inch to ¾ inch of water per zone)
  • Adjust the timer/controller on automatic sprinklers according to seasonal water demands and weather conditions
  • Turn off sprinklers when it's raining or install a rain shut-off device
  • Avoid watering on windy days
  • Adjust sprinklers so they water the lawn, not the pavement
  • Avoid sprinklers that spray a fine mist, which increases evaporation
  • Make sure plants are not blocking sprinklers
  • Irrigation systems should be zoned so plants with different water needs are irrigated separately (grass, for example, should be watered separately from shrubs and flowers)
  • Drip irrigation systems (which use less water than sprinklers) are recommended for trees, shrubs and flowers

  • Time of Year Odd Numbered or No Addresses Even Numbered Addresses Nonresidential Properties
    Daylight Saving Time (DST) Wednesday and Saturday Thursday and Sunday Tuesday and Friday
    Eastern Standard Time (EST) Saturday Sunday Tuesday

landscape

Water Conserving Tips For Your Yard

With a little bit of planning, homeowners can turn their landscaping projects into water-saving ventures. One of the most important steps in landscape design is putting the right plant in the right place.

Grouping plants together based on their water needs, not just their colors, is healthier for your plants and allows you to use water more efficiently.

Keep high-water use plants together in an "Oasis" area and locate the more drought tolerant species that will not need watering to the outer edges, or "Fringe", of the landscape. In between the "Oasis" and "Fringe" zones are the "Transition" plantings, which should be tough, durable plants that need some water about once a week.

Use good horticultural practices to keep your landscape looking its best. Improve sandy sites with organic matter before adding plants and remember to use mulch. When water is needed, wet the soil and then wait until it starts to dry before irrigating again. Only fertilize if you want growth and if adequate moisture is available.

In the beginning, all waterwise plantings will need irrigating until their roots take hold. Once that happens, watering can be reduced or even eliminated for some plantings.

Below are just a few examples of plants that can be used to make your yard more waterwise:

Ground Cover Vines
Shrubs Trees
•  False Heather •  Bougainvillea •  Ligustrum •  Oak
•  Day Lily •  Trumpet Vine •  Texas Sage •  Citrus
•  Junipers •  Climbing Fig •  Camellia •  Southern Magnolia
•  Trumpet Vine

More Landscaping Tips:

Give ground covering plants like ivy and ferns adequate room to grow. Congestion or competition leads to root rot. Make sure vines have something to grow on like a trellis or fence. Avoid letting vines grow up a tree. Examine each plant for insects, diseases and mechanical damage. Avoid power lines when planting trees.

Remember over-watering promotes shallow root growth and makes your lawn more susceptible to insects and disease.

Want to learn more?

Read about Florida-Friendly Landscaping that conserves water and protects the environment.

Water Conservation Videos (English)


Water Conservation Videos (español)